Open topic with navigation
Software Forms > FEM Viewer > Quick Reference > Data
Data Menu
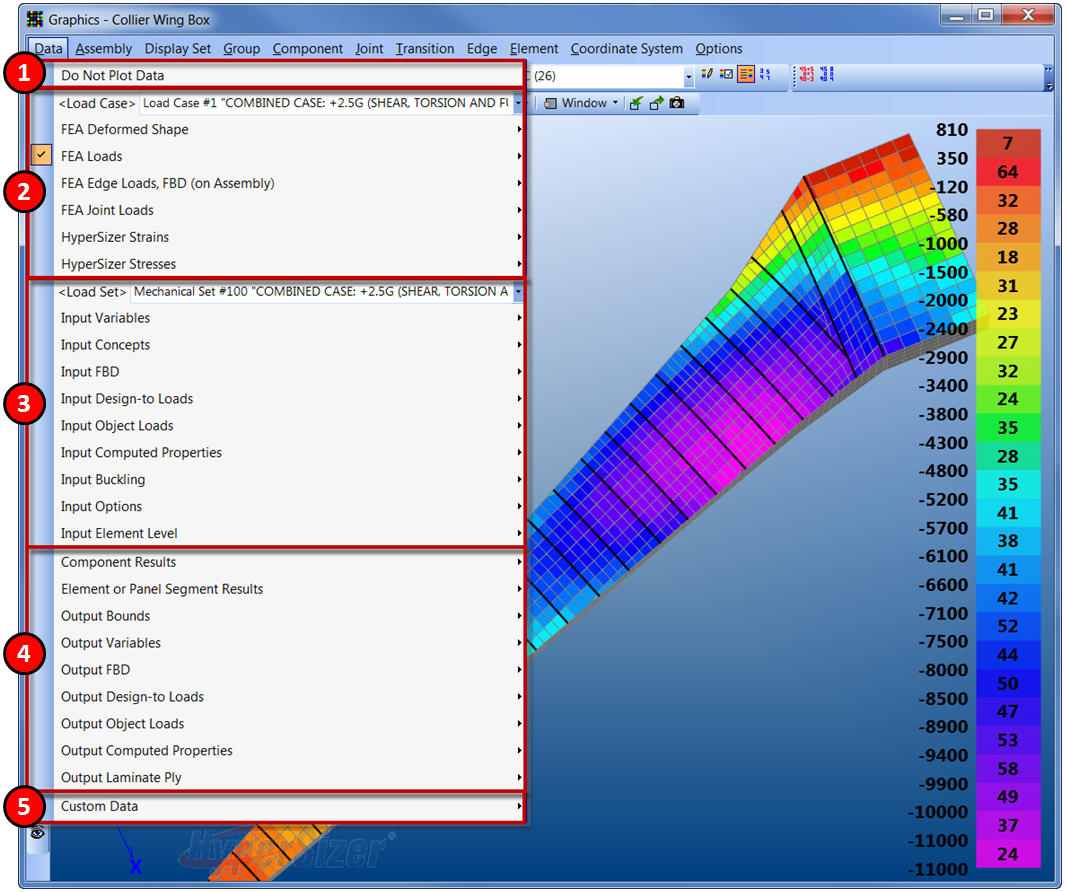
The Data menu is separated into logical sections. Each section is organized by sub-menus, which allow the user to quickly browse and select the desired plotting options.
- Do Not Plot Data - This option deactivates any plotting selection in the Data menu. When this option is selected, the elements in the model will appear gray and the plot title will read "No Data".
- The FEA Data section contains options for plotting all the FEA input data including deformation, mechanical loads, thermal loads, pressure loads, and joint loads. The data in this section is visualized per load case. This section also contains the computed stress and strain plotting options. The load case drop-down menu allows the user to choose the load case that HyperSizer will plot after selecting a graphing option from the section.

- The Analysis Input section contains the HyperSizer input variable plotting options. This section includes options that will plot every user-defined variable on the Sizing form by component. The options in this section are typically used to understand the pre-analysis user inputs.
- The Analysis Results section contains the HyperSizer analysis output plotting options. This section includes options that plot every HyperSizer-calculated variable listed on the Sizing form by component or element. Shortcuts for plotting frequently used output, like minimum margin of safety and controlling failure analysis, are provided on the Plot Component Results toolbar.
How to Plot Data
- Select the Color by Data Bin
 option on the toolbar.
- Select a plotting option from the data drop-down menu.
Once a plotting option is chosen from a sub-menu, HyperSizer generates a plot representing the appropriate component/element data.
Tip: Use hot keys to cycle through plotting output. Click [Page Up]/[Page Dn] to preview the next plot option in a submenu. Click [Shift]+[Page Up]/[Page Dn] to preview the next load case .